Experiments in Sourdough #5-6
I am not quite ready to give up! I feel like I’m so close to success and just need to make a few more tweaks to achieve it.
Attempt #4 left me with the sad realization that my starter just doesn’t seem to be started well enough to generate the yeast that bread needs to rise. I feel that it will get there with love, time, and care, but it’s not there yet. This means that a major culprit of my non-rising dough is probably due to the lack of yeast. To combat this, I opted to add yeast for attempt #5. Sadly, I seem to have lost my notes for that attempt. It didn’t rise as much as it should have because my dough was entirely too dry thanks to my earlier attempts that involved adding more flour.
Attempt #6, however, was much more successful! That attempt went something like this:
Morning Day #1
Proof Starter: Pour starter into large bowl, add 1 cup water and 1 cup flour, stir and set aside until evening. (Here I opted to start feeding my starter with wheat flour instead of white flour, just to reduce the amount of refined flour in the bread.)
Evening Day #1
15 ounces all purpose flour
1 1⁄2 teaspoons salt
1⁄4 teaspoon yeast
9 ounces sourdough starter
4 ounces water
3 ounces beer
1 tablespoon white vinegar
1. Whisk flour, salt and yeast in large bowl. Add starter, water, beer and vinegar. Using rubber spatula, fold mixture, scraping up dry flour from bottom of bowl. Cover bowl with plastic wrap and let sit at room temperature until morning.
**
Morning Day #2**
1. Lay 12- by 18-inch sheet of parchment paper inside 10-inch skillet and spray with nonstick cooking spray. Transfer dough to lightly floured work surface and knead 10 to 15 times. Shape dough into ball by pulling edges into middle. Transfer dough, seam-side down, to parchment-lined skillet and spray surface of dough with nonstick cooking spray. Cover loosely with plastic wrap and let rise at room temperature until dough has doubled in size and does not readily spring back when poked with finger, about 2 hours.
2. About 30 minutes before baking, adjust oven rack to lowest position, place 6- to 8-quart heavy-bottomed Dutch oven (with lid) on rack, and heat oven to 500*F. Carefully remove pot from oven and remove lid. Pick up dough by lifting parchment overhang and lower into pot (let any excess parchment hang over pot edge). Cover pot and place in oven. Reduce oven temperature to 425*F and bake covered for 30 minutes. Remove lid and continue to bake until loaf is deep brown and instant-read thermometer inserted into center registers 210*F, 20 to 30 minutes longer. Carefully remove bread from pot; transfer to wire rack and cool to room temperature, about 2 hours.
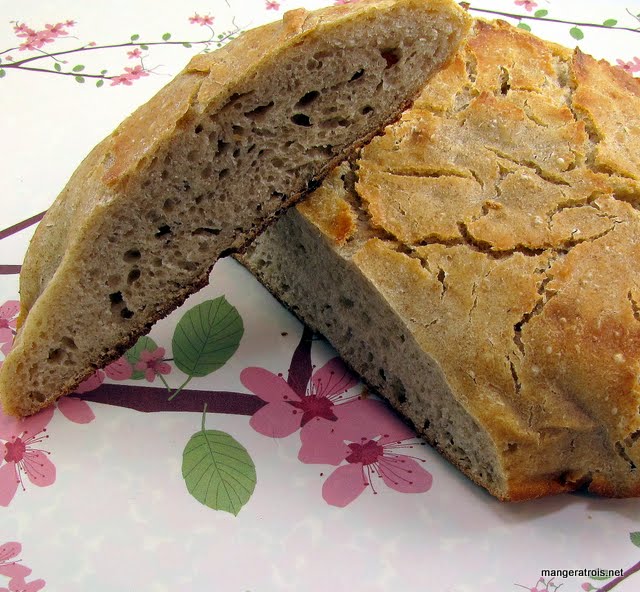
Since I didn’t post pictures of the failed attempts 4 and 5, you can’t see how much better this loaf is than those loaves were! This loaf has almost twice the height of loaves 4 and 5! It did rise better than attempt #3 as well. This loaf definitely felt like progress. The wheat flour in the starter added a nice dimension to the flavor and the lack of refrigerator didn’t diminish the sourdough tang at all.
I believe that my problem with this loaf was that I didn’t allow it to rise long enough on the morning of day 2. It did readily spring back when I poked it, but I went with it anyway. Very foolish. For my next attempt I’ll be using a different vessel for the rising so that I can easily see when the dough is doubled. I think this will work better for me than the skillet where I have a hard time gauging things. The house was pretty cold as well, so it might be that the temperature affected the rise.
I think I’m close.